SPACEFILLER Installation Process: Part 2
It's four days before art walk and Alex and Alex from SPACEFILLER are back at the shop to install. The duo has returned for yet another round of projection mapping on their sneaker installation.

Projection mapping, a process that I'm still struggling to grasp, is apparently something that takes more than just one go, and a lot of attention to detail. As far as I understand, it seems to be a sort of weaving back and forth between the physical and the digital world. Every time the installation moves, changes or grows, out come the key boards and wires while Alex and Alex manipulate the digital side of the projection, mapping it to the physical structure. This happens countless times as we reposition our High Top-ography installation.

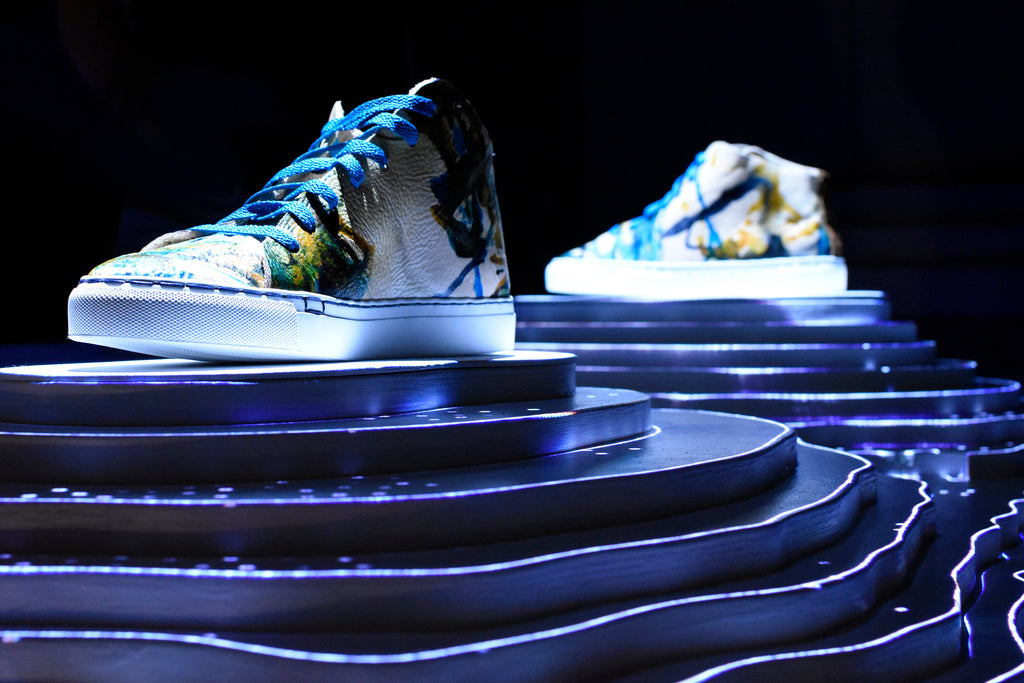
What was once a ground level sculpture now has 12 legs and stands three feet tall. The artists, who are replete in jokes, chuckle about grabbing their Tech Decks from the car to skate down the 8 steps that compose the surface of the installation.

While the installation itself isn't hard to miss, there's intrigue that lies in the behind the scenes process and all its glorious detail. To ensure sure you don't miss a thing come opening night, I've made a list of some notable details to scope on the High Top-ographt install.
LED lights: Glow baby, glow! These LED lights line the interior of the structure.
Pressure sensor: Pick up a sneaker and watch what happens!
Custom projection mapping: Fun fact, Alex and Alex coded an original projection map for the High Top-ography installation.
Birds flocking simulation: Part of this nature-inspired projection uses simulations of birds flocking. Watch for the dots of light that behave like birds in flight when a sneaker is picked up!